Main Toolbar
The main toolbar is always visible regardless of the active mode (Labeling or ML). It groups three bars that handle file management, image navigation, view control, and label management.
File Bar
The file bar is the top horizontal toolbar. It handles loading images and labels, saving, and navigating between images in the current session.
| Icon | Button | Shortcut | Description |
|---|---|---|---|
| Load images and labels | Ctrl+O | Open a folder to load images and their associated label files into the current session. | |
| Save labels | Ctrl+S | Save all labels for all images in the current session. | |
| Save copy | — | Export a copy of the labels to a separate location without overwriting the original files. | |
| Next Image | Ctrl+→ | Navigate to the next image in the loaded image list. | |
| Previous Image | Ctrl+← | Navigate to the previous image in the loaded image list. |
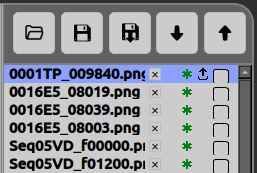
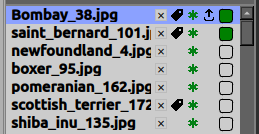
Per-file markers
Once images are loaded, each file in the list is followed by a remove button and a row of status markers:
| Icon | Marker | Description |
|---|---|---|
| Remove file | Remove this file from the list. If it is the image currently displayed, the view is cleared first. | |
| Has labels | Shown when the image contains annotation data (paintbrush overlays, rectangles, ellipses or polygons). Hidden when the image has no labels. | |
| Saved | A green asterisk indicates the image’s labels are saved (no unsaved changes). | |
| Unsaved changes | A red asterisk indicates the image has been edited since the last save. | |
| Loaded in memory | Shown when the image is loaded into memory. Hidden when the image is listed but not yet loaded. | |
| Complete | A checkbox used to mark the image as complete/finished — empty when unchecked, green when checked. Its state is saved alongside the labels and restored when the project is reopened. |
Label Bar

The label bar is the bottom horizontal toolbar. It holds two permanent buttons on the left and, for each label created (e.g. Cat, Dog), a dedicated group of buttons.
Permanent buttons
| Icon | Button | Shortcut | Description |
|---|---|---|---|
| New Label | Ctrl+N | Open a dialog to create a new label, where you set its name, labeling mode (pixel-by-pixel or geometric) and color. When the geometric mode is selected, you also set the outline thickness used for its geometric shapes (ellipse, rectangle, polygon). This is also where you can import existing labels, using one of the three import formats (Binary Mask, Indexed PNG, RGB Colour Mask). See Import Examples for a tutorial on each format. | |
| Opacity | Ctrl+Shift+O | Open a dialog to adjust the transparency of the label overlays. |
Per-label buttons
| Icon | Button | Shortcut | Description |
|---|---|---|---|
| Activation | — | Click the label’s name to select the label to draw/select for the labeling mode. Selecting a label makes it visible and switches the toolbar to its labeling mode. | |
| Color | — | A colored bar showing the label’s current color. Click it to open a color picker and change the label’s color. | |
| Visibility | — | Toggle the visibility of this label and all its shapes. The active label always stays visible. | |
| Label Setting | — | Open the label’s settings to rename it, change its labeling mode or color. When the label is in geometric mode, this dialog also sets the outline thickness used for its geometric shapes (ellipse, rectangle, polygon). Changing the labeling mode erases the existing work for that label. | |
| Remove Label | Delete | Delete this label. After confirmation, all work done with it is erased on every image and in the save. |
Image Bar
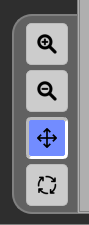
The image bar is the vertical toolbar that controls how the current image is displayed in the viewer (zoom and navigation).
| Icon | Button | Shortcut | Description |
|---|---|---|---|
| Zoom Plus | Z | Activate zoom-in mode: click on the image to zoom in. | |
| Zoom Minus | X | Activate zoom-out mode: click on the image to zoom out. | |
| Move | H | Activate move mode: drag the image to pan it around in the viewer. | |
| Move/Zoom Reset | 0 | Reset the image’s position and zoom level back to the default view. |